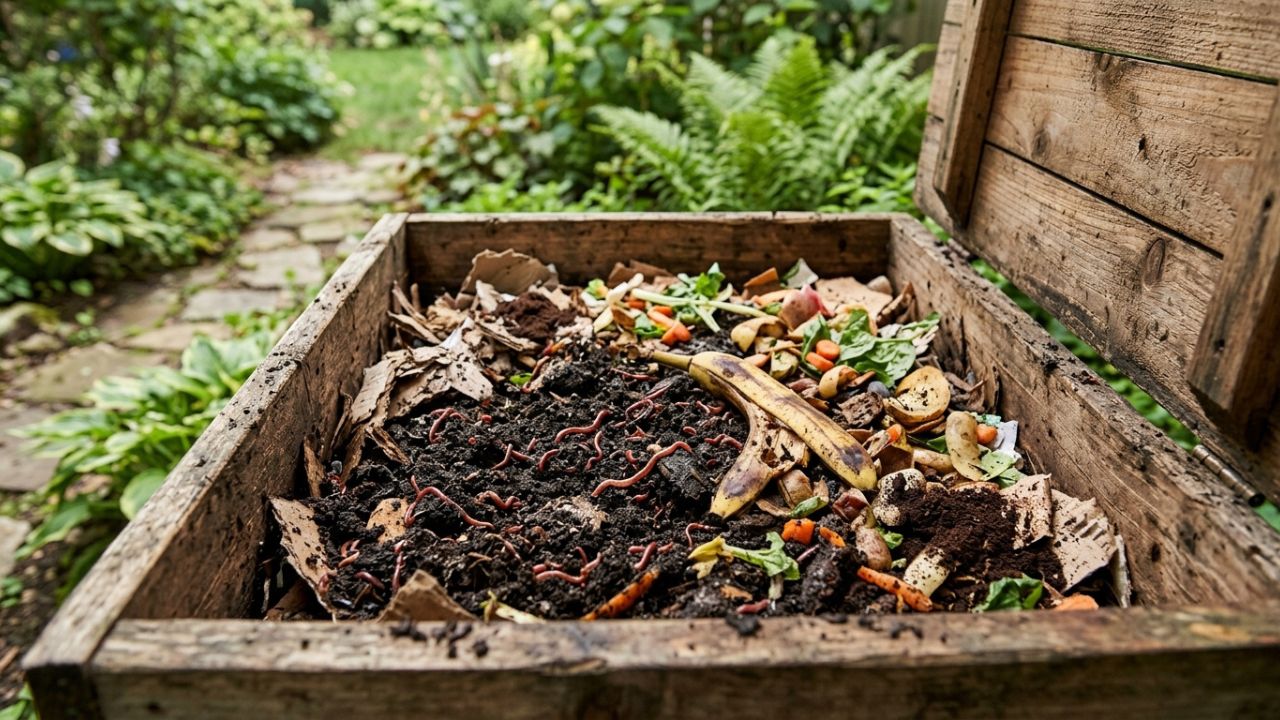
Anyone who has ever tossed a bruised banana or a pile of coffee grounds into the trash and felt a small pang of guilt understands the appeal of worm composting.
Also known as vermicomposting, this practice uses red wiggler worms to break down kitchen scraps into rich, dark compost that plants absolutely love. It is quiet, it does not smell bad when done correctly, and it can be done in an apartment, a garage, or a backyard.
For people who are just starting to explore a more sustainable and eco-friendly lifestyle, worm composting is one of the most rewarding entry points because it turns household waste into something genuinely useful.
Getting started does not require a huge investment, but a few well-chosen products can make the process smoother and far more enjoyable. Below is a guide to nine worm composting products that are especially helpful for beginners, along with tips on how to use them and what to look for when shopping.
Why Worm Composting Is Worth Trying
Before diving into the product list, it helps to understand why so many eco-conscious households are drawn to this hobby. Worm composting diverts food waste from landfills, where it would otherwise release methane, a greenhouse gas far more potent than carbon dioxide. Instead, that same waste becomes worm castings, a nutrient-dense soil amendment that gardeners often call black gold.
Unlike traditional outdoor composting, vermicomposting can happen indoors year round, which makes it accessible to people without a yard. It also produces compost faster in many cases, since the worms are actively processing the material rather than waiting on microbial breakdown alone.
1. A Beginner-Friendly Worm Bin
The foundation of any worm composting setup is the bin itself. New composters often assume any plastic container will do, but a purpose-built bin usually includes ventilation holes, a spigot for draining excess liquid, and stackable trays that make harvesting compost much easier.
- Look for a bin with multiple trays so finished compost can be separated from active worm activity
- Choose a size appropriate for household food waste, since an oversized bin can be harder to manage for a first timer
- Check that the material is food-safe plastic or untreated wood
A well-designed bin removes much of the guesswork from managing moisture and airflow, which are the two biggest challenges new vermicomposters face.
Tray Systems vs Single Bin Designs
Tray-based systems allow worms to migrate upward toward fresh food, leaving finished compost behind in the lower trays. This makes harvesting less messy because there is no need to manually separate worms from compost. Single bin designs are usually cheaper but require more hands-on sorting when it is time to collect the finished product.
2. Red Wiggler Worms
The bin is only half the equation. The worms themselves matter just as much, and not all worms are suited for composting. Red wigglers, scientifically known as Eisenia fetida, are the species most commonly recommended because they thrive in the confined, food-rich environment of a compost bin.
Earthworms found in a backyard garden are not a good substitute, since they are burrowing worms adapted to soil rather than surface decomposition. Starter kits typically include a pound of live worms, which is enough to begin processing a moderate amount of kitchen scraps.
3. Coconut Coir Bedding
Bedding gives worms a place to live and helps regulate moisture inside the bin. Coconut coir, made from the fibrous husk of coconuts, is a popular choice because it holds water well without becoming soggy, and it is a renewable byproduct rather than a resource that requires new harvesting.
- Expands significantly when soaked in water, so a small compressed brick goes a long way
- Naturally resistant to mold compared with some paper-based bedding
- Provides a neutral pH that suits worm health
Shredded newspaper or cardboard can also work as bedding, but coir tends to be gentler for beginners because it holds its structure and does not compact as easily.
4. A Reliable Moisture Meter
One of the most common mistakes new composters make is misjudging moisture levels. A bin that is too dry stresses the worms, while one that is too wet can turn anaerobic and start to smell. A simple moisture meter takes the guesswork out of this and gives a clear reading of what is happening inside the bin.
Worm bins generally do best when the bedding feels like a wrung-out sponge. A meter helps confirm this without the trial and error that often accompanies a beginner’s first few months.
5. Worm Bedding pH Test Strips
Along with moisture, pH balance plays a major role in how well a worm bin functions. Red wigglers prefer a slightly acidic to neutral environment, generally in the range of 6.5 to 7.5. Adding too much acidic food waste, such as citrus peels, can throw this balance off and slow down the worms’ activity.
pH test strips are inexpensive and easy to use, offering a quick way to check whether adjustments are needed. If the reading trends too acidic, a small amount of crushed eggshell or garden lime can help bring things back into balance.
6. A Kitchen Compost Collection Bin
Feeding a worm bin becomes much easier with a small countertop container to collect scraps throughout the day. Rather than making multiple trips outside or to the garage, scraps can be gathered in the kitchen and delivered to the worm bin once or twice a day.
| Feature | Why It Matters for Beginners |
|---|---|
| Carbon filter lid | Reduces odor while scraps sit before being added to the bin |
| Compact countertop size | Encourages consistent daily use without cluttering the kitchen |
| Dishwasher-safe materials | Makes cleaning simple and keeps bacteria from building up |
| Handle for easy carrying | Simplifies the trip from kitchen to worm bin |
Having this small system in place removes friction from the process, which is often the difference between a habit that sticks and one that fades after a few weeks.
7. A Compost Thermometer
While worm bins do not typically heat up the way traditional hot compost piles do, a thermometer can still be a useful diagnostic tool. Extreme temperature swings, whether from direct sunlight or a cold garage floor, can harm or even kill worms.
A basic compost thermometer allows a beginner to monitor conditions and relocate the bin if needed. Ideal temperatures for red wigglers generally fall between 55 and 77 degrees Fahrenheit.
Signs the Bin Temperature Needs Attention
- Worms clustering near the top of the bin, which can signal the lower layers are too hot or too cold
- A noticeable drop in feeding activity
- Condensation building up inside the bin, which may indicate temperature swings affecting moisture
8. Garden Gloves Suited for Compost Work
Handling bedding, scraps, and finished compost is a hands-on process, and a dedicated pair of gloves keeps things sanitary while protecting skin from minor scrapes on bin edges or trays. Many composters prefer a lightweight, breathable glove that still allows for careful handling of worms, since they are delicate and can be injured by rough movement.
- Choose a snug fit to maintain dexterity when sorting through bedding
- Look for a washable material so the gloves can be reused indefinitely
- Avoid thick gardening gloves that make it hard to feel for worms while harvesting compost
9. A Compost Sifter
Once a batch of compost is ready to harvest, a sifter helps separate the fine, usable compost from larger unfinished pieces of food or bedding. This step improves the quality of the final product and ensures any leftover worms are gently returned to the bin rather than added to garden soil.
A simple mesh sifter placed over a wheelbarrow or bucket works well for this task. Beginners often skip this step at first, only to find their compost full of eggshell fragments or partially broken down cardboard. A quick sift solves that problem and results in a smoother, more finished product ready for potted plants or garden beds.
Bringing It All Together
Starting a worm composting system does not require every item on this list right away. Many beginners start with just a bin, bedding, and worms, then add tools like a moisture meter or sifter as they become more comfortable with the process. The goal is progress, not perfection, and even a modest setup can meaningfully reduce household food waste over time.
A Simple Starter Checklist
- A ventilated worm bin, ideally with stackable trays
- A pound of red wiggler worms
- Coconut coir or shredded paper bedding
- A small kitchen scrap collection container
- Basic tools for monitoring moisture and pH as confidence grows
For anyone drawn to a more sustainable lifestyle, worm composting offers a rare combination of practicality and genuine connection to the natural cycle of decay and renewal.
It transforms banana peels and coffee grounds into something a garden can actually use, all while quietly reducing the household’s environmental footprint. With the right beginner products in place, the learning curve becomes far less intimidating, and what starts as a small kitchen habit often grows into a lasting part of a greener daily routine.
Frequently Overlooked Tips for New Composters
- Avoid adding meat, dairy, or oily foods to a worm bin, since these attract pests and create odor problems
- Chop larger scraps into smaller pieces to help worms process food more quickly
- Keep the bin in a shaded, temperature-stable location such as a closet, garage, or covered porch
- Feed gradually at first, since overfeeding a new bin can lead to buildup and odor before the worm population has grown enough to keep pace
With patience and the right basic tools, worm composting becomes a low-maintenance habit that pays off in healthier soil, less landfill waste, and a small but meaningful step toward everyday sustainability.